English
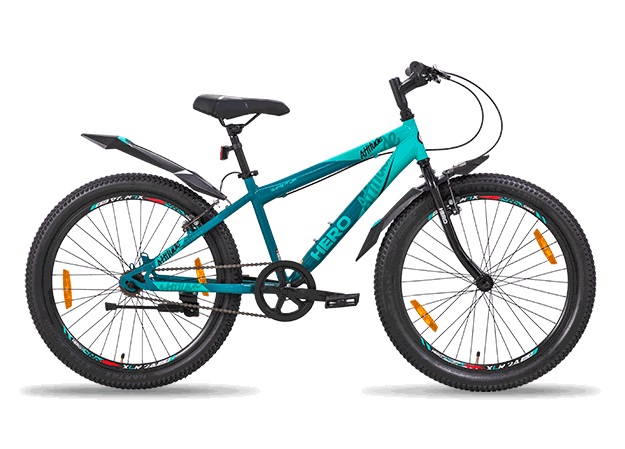
How to Clean and Care for Your Mountain Bike After Every Ride
For every rider who loves the thrill of off-road trails, muddy terrains, and rocky paths, owning a mountain bike is more than a hobby, it’s a lifestyle. The sense of freedom you get while conquering hills and navigating forest tracks is unmatched. However, with that adventure comes responsibility. Dirt, grit, and moisture can quickly wear down your bike’s components, reduce performance, and shorten its lifespan.
That’s why proper cleaning and maintenance after each ride are not optional, they’re essential. Whether you’re a weekend trail warrior or a daily rider, knowing how to clean and care for your bike properly can make all the difference between a smooth, long-lasting ride and frequent costly repairs.
1. Why Cleaning Your Mountain Bike Matters
Your mountain bike isn’t just exposed to dust, it faces mud, sand, water, gravel, and even salt depending on where you ride. These elements can accumulate on the frame, drivetrain, and brakes, causing corrosion and performance issues.
Neglecting cleaning might seem harmless at first, but here’s what happens over time:
- Reduced Gear Efficiency: Dirt and grime wear out your chain and cassette.
- Brake Failure Risks: Mud buildup reduces brake responsiveness.
- Corrosion: Water and debris can rust metal parts and damage bearings.
- Premature Wear: Components like derailleurs and chains wear out faster.
Cleaning isn’t just about appearance, it’s about protecting your investment and ensuring safety on every ride. Regular maintenance keeps your ride smoother, extends the life of parts, and helps you spot potential issues before they become major problems.
2. Tools and Supplies You’ll Need
Before you begin, gather everything you’ll need for a proper cleaning session. The right tools make the process faster and more effective.
Here’s your cleaning kit checklist:
- A bucket of warm water
- Mild bike-specific cleaner or dish soap
- Soft brushes (various sizes for different components)
- Sponge or microfiber cloths
- Chain degreaser
- Chain cleaning tool (optional but handy)
- Bike stand (for easy access and rotation)
- Bike lubricant (chain lube)
- Towel for drying
Avoid harsh detergents or pressure washers, they can strip lubrication or force water into bearings and seals. Stick to gentle yet effective cleaning solutions designed for bicycles.
3. Pre-Cleaning: Prep Your Bike
Before you start scrubbing, it’s important to set up your cleaning space and prep your bike.
- Choose an open area: Preferably outside or near a drain.
- Mount your bike: Use a repair stand if you have one to make it easier to rotate and reach all angles.
- Remove accessories: Take off bottles, saddle bags, or electronic devices to prevent water damage.
- Rinse off loose dirt: Use a gentle spray of water or a soft brush to knock off mud and dust before applying cleaners.
If your mountain bike has disc brakes, avoid spraying directly on the rotors or pads, keep them dry to maintain braking efficiency.
4. Step-by-Step Guide: How to Clean Your Bike Properly
Cleaning your bike doesn’t have to be complicated. Follow this simple routine to make sure every part gets the care it deserves.
Step 1: Wash the Frame
Start with the frame since it’s the largest surface and collects most dirt.
- Apply your bike cleaner or mild soap solution.
- Use a sponge or soft brush to gently scrub away mud and grime.
- Focus on the underside of the frame, where dirt tends to stick.
- Rinse with clean water but avoid high pressure.
Dry the frame using a microfiber towel to prevent water spots.
Step 2: Clean the Drivetrain
The drivetrain is the heart of your bike, it’s where dirt causes the most damage.
- Apply degreaser to the chain, cassette, and chainrings.
- Let it sit for a few minutes to loosen the grime.
- Use a chain cleaning tool or brush to scrub thoroughly.
- Rinse with water, then wipe with a clean cloth.
Avoid using WD-40 or car degreasers, they can be too harsh and strip away necessary lubrication.
Step 3: Pay Attention to the Wheels and Tires
Your wheels endure the most contact with mud and gravel.
- Spin each wheel and brush off any stuck debris or stones.
- Check tire tread for sharp objects or embedded thorns.
- Clean the rims, spokes, and hubs gently with a soft brush.
- Wipe dry with a towel.
While cleaning, check for any wobbles or loose spokes, it’s easier to fix these early.
Step 4: Clean the Brakes and Suspension
- For disc brakes, use a dedicated brake cleaner or rubbing alcohol on a clean cloth. Avoid touching rotors with greasy hands.
- For rim brakes, check that pads are not worn down and remove any grit.
- Wipe down suspension forks and shocks, ensuring seals are clean and lubricated.
This not only improves performance but also prevents squeaky noises during rides.
Step 5: Final Rinse and Dry
Give your entire bike a final gentle rinse to wash away any remaining soap or degreaser.
Then, use a soft towel to dry every part thoroughly. Don’t let water sit, especially near bearings, as it can lead to rust.
For best results, leave your mountain bike to air dry for 10–15 minutes before applying lubrication.
5. Post-Cleaning Lubrication
Once your bike is clean and dry, it’s time to relubricate moving parts. This prevents rust, reduces friction, and ensures smooth performance.
Lubricate the Following:
- Chain: Apply a few drops evenly while rotating the pedals backward. Wipe off excess lube to avoid attracting dust.
- Derailleurs: Add a drop where pivot points move.
- Cables: If visible, lightly oil them for smoother shifting.
Always use bicycle-specific lubricants, dry lube for dusty environments, wet lube for rainy or muddy rides.
6. Inspect Your Bike After Cleaning
Cleaning time is also inspection time. After every thorough wash, do a quick check of key components:
- Brakes: Ensure they engage smoothly and don’t squeal.
- Gears: Shift through all gears to confirm proper alignment.
- Chain: Look for stiffness or rust spots.
- Tires: Inspect air pressure and look for cuts or punctures.
- Frame: Check for cracks or unusual wear.
These quick checks can save you from potential breakdowns mid-ride.
7. Common Cleaning Mistakes to Avoid
Even experienced cyclists make errors that can damage their bikes unintentionally. Here are the biggest mistakes to avoid:
- Using High-Pressure Water: It can force water into sealed areas like hubs and bearings.
- Skipping Lubrication: Cleaning without reapplying lube can dry out the drivetrain.
- Using Harsh Chemicals: Avoid household degreasers, they can damage paint and seals.
- Over-lubing: Excess lubricant attracts more dirt.
- Ignoring Regular Checks: Small issues like chain squeaks or brake rubs worsen over time.
Cleaning should preserve your bike’s performance, not compromise it.
8. The Joy of a Well-Maintained Bike
There’s a special kind of satisfaction in riding a clean, smooth, and perfectly tuned bicycle. The gears click effortlessly, the brakes respond instantly, and every pedal feels powerful. That’s the reward of consistent care.
Your bike takes you through adventures, challenges, and scenic escapes. Returning the favor by maintaining it ensures those experiences continue, safely and joyfully.
If you’re just getting started and planning to upgrade your gear, you can easily buy cycle online from reputable platforms that offer durable models, accessories, and maintenance support all in one place.
Owning a mountain bike is like having a loyal adventure partner, it performs best when treated with care. After every ride, a few minutes of cleaning and inspection go a long way in keeping your bike in peak condition.
From washing the frame and cleaning the drivetrain to checking brakes and reapplying lubrication, every step matters. Maintenance not only improves performance but also builds a deeper connection with your bike, it becomes an extension of your lifestyle.